Bradford VS Leyton Orient
Recent Form
 Bradford
L
W
W
L
L
Head to Head
Mar 7, 2026
Bradford
VS
Leyton Orient

2 - 1
Bradford
VS
Leyton Orient
 League One
University of Bradford Stadium
2025
League One
University of Bradford Stadium
2025
Dec 20, 2025
Leyton Orient
VS
Bradford
2 - 1
Leyton Orient
VS
Bradford
League One
Brisbane Road
2025
May 8, 2023
Bradford
VS
Leyton Orient
1 - 1
Bradford
VS
Leyton Orient
 League Two
University of Bradford Stadium
2022
League Two
University of Bradford Stadium
2022
Dec 3, 2022
Leyton Orient
VS
Bradford
3 - 0
Leyton Orient
VS
Bradford
League Two
Brisbane Road
2022
Feb 1, 2022
Bradford
VS
Leyton Orient
1 - 1
Bradford
VS
Leyton Orient
League Two
University of Bradford Stadium
2021
Match Events
Bradford
Leyton Orient
26'
Josh Koroma
Yellow Card
Foul
33'
⚽
A. Sarcevic
Assist: J. Neufville
40'
⇄
J. Koroma
On: J. Koroma
Off: F. Fawunmi
Substitution
43'
⚽
O. O'Neill
44'
Sean Clare
Yellow Card
Argument
53'
⇄
K. Casey
On: K. Casey
Off: T. James
Substitution
53'
⇄
D. Happe
On: D. Happe
Off: J. Simpson
Substitution
53'
⇄
D. Happe
On: D. Happe
Off: J. Simpson
Substitution
53'
⇄
K. Casey
On: K. Casey
Off: T. James
Substitution
54'
Favour Fawunmi
Yellow Card
Time Wasting
59'
Matthew Pennington
Yellow Card
Foul
61'
Tyreik Wright
Yellow Card
Argument
61'
Curtis Tilt
Yellow Card
Foul
67'
Max Power
Yellow Card
Argument
71'
⇄
E. Wheatley
On: E. Wheatley
Off: P. Mullin
Substitution
71'
⇄
B. Pointon
On: B. Pointon
Off: S. Humphrys
Substitution
71'
⇄
Bobby Pointon
On: Bobby Pointon
Off: Stephen Humphrys
Substitution
71'
⇄
Ethan Wheatley
On: Ethan Wheatley
Off: Paul Mullin
Substitution
74'
⇄
D. Levitt
On: D. Levitt
Off: T. Bakinson
Substitution
75'
Aden Baldwin
Red Card
Foul
79'
⚽
A. Sarcevic
Assist: S. Humphrys
86'
Antoni Sarcevic
Yellow Card
Simulation
87'
Paul Mullin
Yellow Card
Time Wasting
Lineups
Bradford
(3-4-2-1)
Starting XI

S. Walker
#1

M. Power
#6

J. Neufville
#7

A. Sarcevic
#10

A. Baldwin
#15
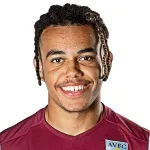
T. Wright
#17

Jenson Metcalfe
#21

J. Metcalfe
#21

B. Pointon
#23

C. Tilt
#26

E. Wheatley
#27

M. Pennington
#28







Leyton Orient
(3-4-2-1)
Starting XI

J. Morris
#3

D. Happe
#5

W. Forrester
#6

O. O'Neill
#7

W. Dennis
#12

K. Casey
#16
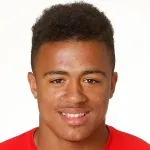
J. Koroma
#17

D. Levitt
#24

S. Clare
#28

D. Ballard
#32

T. Archibald
#44
Substitutes






Match Statistics
Bradford
Leyton Orient
62%
Possession
38%
17
Shots
5
7
Shots on Target
1
3
Blocked Shots
1
17
Fouls
16
11
Corners
2
6
Yellow Cards
3
1
Red Cards
0
3
Offsides
1
1
Saves
5
417
Passes
253
274
Accurate Passes
129
66%
Pass Accuracy
51%
Team Comparison
51.8
Overall Strength
43.3
48.5%
Attacking Power
51.5%
58.3%
Defensive Strength
41.7%
60.1%
Current Form
39.9%
50%
Discipline
50%
Under/Over Statistics
Bradford
Leyton Orient
0%
Over 0.5
0%
0%
Over 1.5
0%
0%
Over 2.5
0%
0%
Over 3.5
0%
Both Teams Score
0%
|
0%
Clean Sheets
29%
|
22%
Avg Total Goals
2.3
|
2.8
Cards Analysis
Bradford
1.9/Game
90
1
0-15'
2
16-30'
12
31-45'
20
46-60'
18
61-75'
17
76-90'
22
Leyton Orient
1.7/Game
78
2
0-15'
2
16-30'
12
31-45'
16
46-60'
21
61-75'
13
76-90'
16
Season Comparison
2025/2026
Bradford
22W 11D 0L
|
58:53
|
1.6 ppg
Leyton Orient
14W 10D 0L
|
59:71
|
1.13 ppg
2024/2025
Bradford
22W 12D 0L
|
64:45
|
1.7 ppg
Leyton Orient
24W 8D 0L
|
75:52
|
1.63 ppg
2023/2024
Bradford
19W 12D 0L
|
61:59
|
1.5 ppg
Leyton Orient
18W 11D 0L
|
53:55
|
1.41 ppg
Match Result
Home Win
Confidence:
76.0%
Goals Prediction
Under 2.5
68.7%
Both Teams Score
No
61.8%
Match Outcome Probabilities
Bradford
76.0%
Draw
18.2%
Leyton Orient
5.7%
AI Quick Analytics Summary
Overall Accuracy
71.0%
| Market | Analysis | Confidence | Value | Result |
|---|---|---|---|---|
| Over 0.5 Goals | Yes | 86.2% | Good | ✓ Correct |
| Under 0.5 Goals | No | 86.2% | Good | ✓ Correct |
| Over 20 Shots | No | 85.5% | Good | ✕ Wrong |
| Over 25 Shots | No | 85.5% | Good | ✓ Correct |
| Over 3.5 Goals | No | 83.8% | Good | ✓ Correct |
| Under 3.5 Goals | Yes | 83.8% | Good | ✓ Correct |
| Home More Shots | Yes | 78.9% | Good | ✓ Correct |
| Match Result | Home Win | 76.0% | Good | ✓ Correct |
| Goal Before 15' | No | 74.8% | Good | ✓ Correct |
| Penalty Awarded | No | 72.2% | Good | ✓ Correct |
| Over 2.5 Goals | No | 68.7% | Fair | ✕ Wrong |
| Under 2.5 Goals | Yes | 68.7% | Fair | ✕ Wrong |
| Over 8 Shots on Target | No | 65.0% | Good | ✓ Correct |
| Red Card | No | 65.0% | Fair | ✕ Wrong |
| Over 9 Corners | Yes | 62.2% | Fair | ✓ Correct |
| Over 11 Corners | No | 62.0% | Fair | ✕ Wrong |
| Both Teams Score | No | 61.8% | Fair | ✕ Wrong |
| Goals After 80' | No | 61.7% | Fair | ✓ Correct |
| Over 1.5 Goals | Yes | 61.3% | Fair | ✓ Correct |
| Under 1.5 Goals | No | 61.3% | Fair | ✓ Correct |
| Goals Both Halves | No | 60.0% | Fair | ✕ Wrong |
| Possession Over 60% | Yes | 60.0% | Fair | ✓ Correct |
| Home Most Corners | Yes | 59.6% | Fair | ✓ Correct |
| Goals in First 30' | Yes | 55.1% | Fair | ✕ Wrong |
| Half Time Result | HT Draw | 49.3% | Low | ✓ Correct |
| Most Likely Score | 1-0 | 18.1% | Good | N/A |
Goals Markets
Over 0.5
86.2%
Over 1.5
61.3%
Over 2.5
31.3%
Over 3.5
16.2%
Under 0.5
13.8%
Under 1.5
38.7%
Under 2.5
68.7%
Under 3.5
83.8%
Half Time Markets
HT Home Win
27.9%
HT Draw
49.3%
HT Away Win
22.8%
Timing Markets
Goal Before 15'
25.2%
Goals in First 30'
55.1%
Goals After 80'
38.3%
Goals Both Halves
40.0%
Corners Markets
Over 9 Corners
62.2%
Over 11 Corners
38.0%
Home Most Corners
59.6%
Goal from Corner
40.0%
Cards Markets
Over 3 Cards
0.1%
Over 5 Cards
0.1%
Red Card
35.0%
Shots Markets
Over 20 Shots
14.5%
Over 25 Shots
14.5%
Over 8 On Target
35.0%
Home More Shots
78.9%
Expected Goals (xG) Markets
Home Exceed xG
50.9%
Away Exceed xG
47.3%
Total xG Over 2.5
33.1%
High xG Variance
40.1%
Special Markets
Penalty Awarded
27.8%
Free Kick Goal
10.0%
Possession Over 60%
60.0%
High Pressing
45.0%
Additional Insights
Strict Referee
50.0%
Strong Venue Adv.
60.0%
Momentum Shift
30.0%
Underdog Upset
20.0%
Expected Values
Total Corners
10.7
Total Cards
0.4